The Paper Kite that`s a Super Little Flyer
Hi kids! Did you know you can create a paper kite from A4 paper and decorate it within an hour then spend another hour having fun flying it? These instructions will show you how.
|
I
didn`t anticipate how much fun Iain and James would have flying the
kite. They even forfeited the swing park as they passed it, in
preference to trying out our super little flyer. This easy-to-make toy
is great for kids aged 3 to 10, (adults included), because it requires only basic kite
craft skills, and you will learn that you can have lots of fun making
things with paper. |
 |
It also helps you to experiment using simple aerodynamics, and participate in group paper projects.
The crew (Iain and James) chose different colors for their kites, and contrasting colors for the tails, so choose from a variety of colored A4 paper.
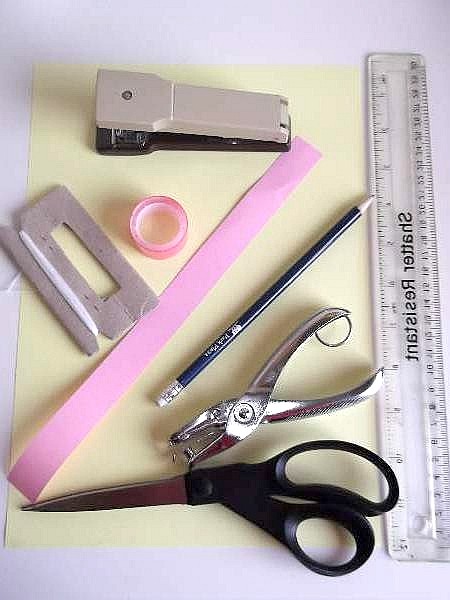 |
Use of the stapler, hole punch, and scissors can be delegated to older children or an adult for safety, but younger ones can do the folding, drawing of lines, and tying of string themselves, with some supervision. So let`s get cracking! You Will Need A4 assorted colored paper, scissors, stapler, hole punch, thin string or strong thread, tape, ruler, and a pencil. |
|
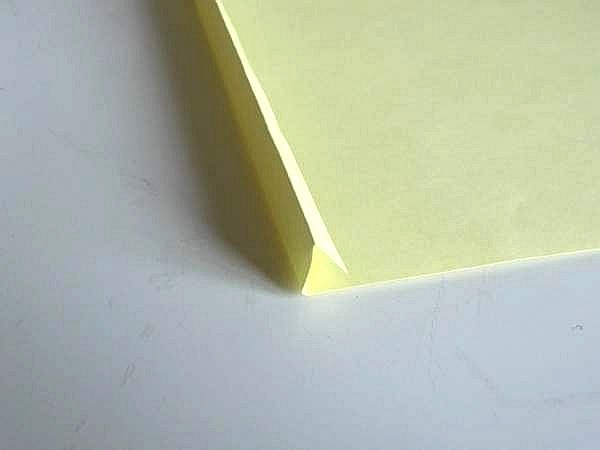
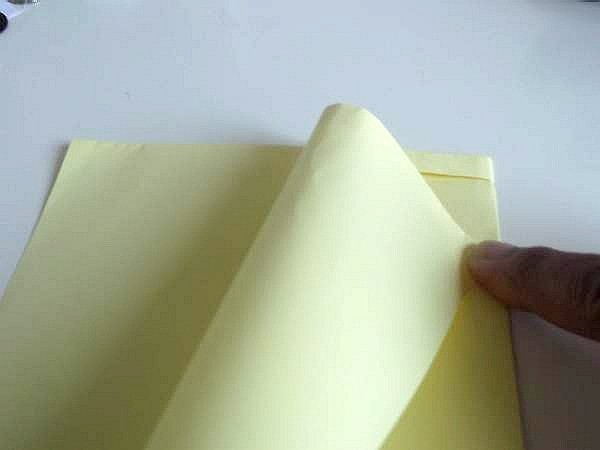
Making the Sail |
 |
 |
Fold it in half with the turned edge inside or out. To make a kite that is evenly balanced you
need to make sure that the sides and corners are flush before you make
the creases, otherwise your kite will spin, or not fly at all. So when
your sure they are even, crease the center. |
 |
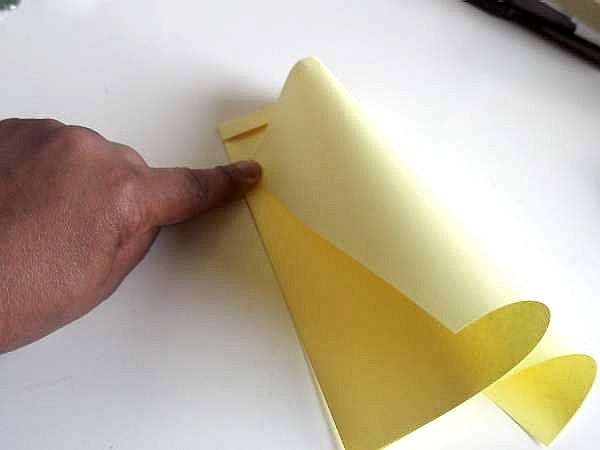 |
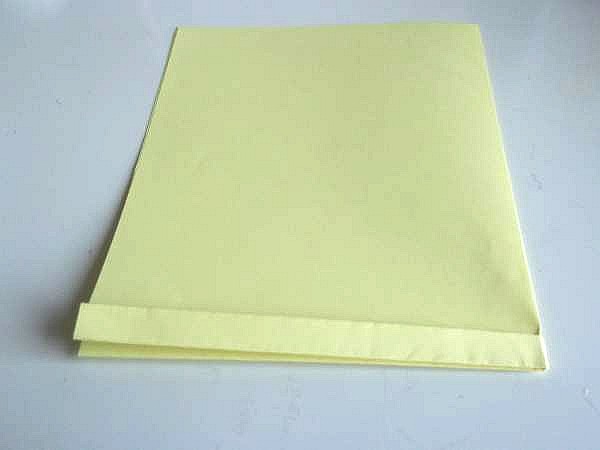
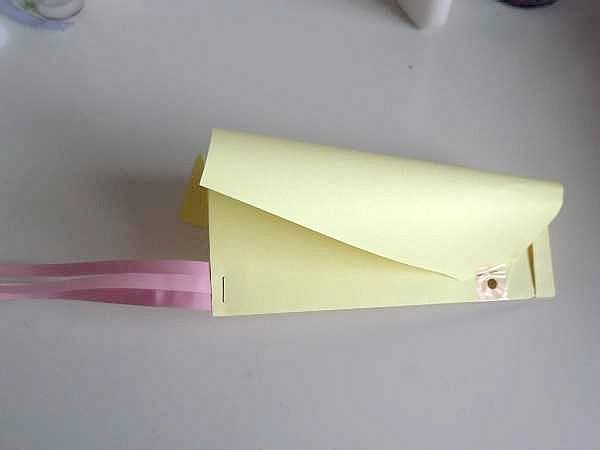
Bring one corner of the folded edge across and place it about 3 1/2cm from the end of the center fold and hold it.
 |
 |
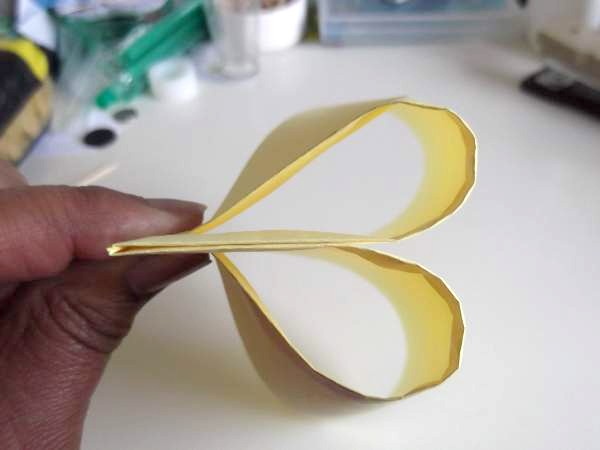
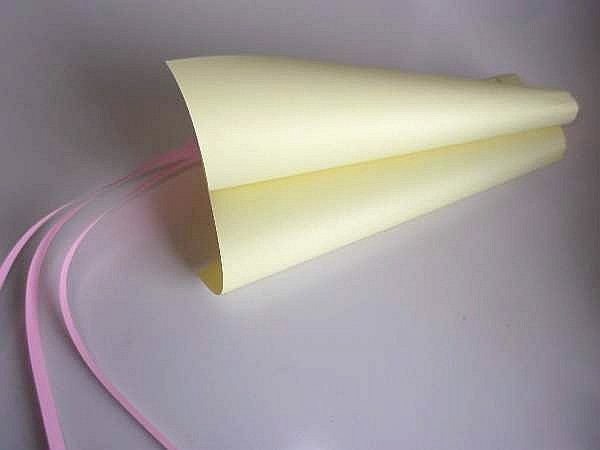
Now turn your paper over and do the same to the other corner. When you are sure they meet at the same point, staple them to fix in place. This forms 2 funnels. Do not press them flat though because they form the cells for your paper kite to catch the wind.
|
Make Hole for Kite Line |
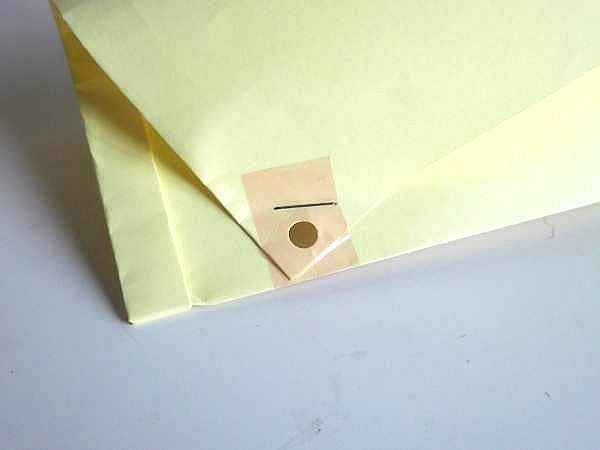 |
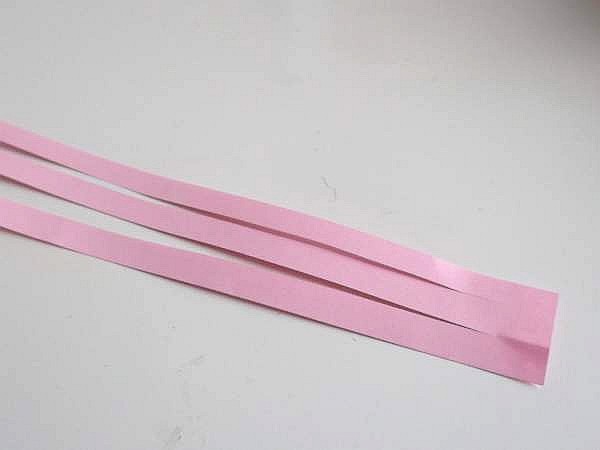 |
Making the tail |
|
Cut along the lines but stopping 2 1/2cm before the end. Insert the strip into the end of the center fold and staple to secure it in place. If you don`t want to use staples, then use glue or tape. Your paper kite is almost finished, but you need to attach a flying line. |
 |
Now
attach your kite line to the paper kite. You will need about 120cm of
strong thread, or fine string. I have used a strong thread before and found it takes some strength to break it, so it was ideal when I had no string at hand.
 |
Thread one end through the hole and tie it securely. You can wrap the thread gently around the kite to prevent tangling until your ready to fly it. Remember to take the thread and sticky tape with you for patching up and repairs if you need to. |
|
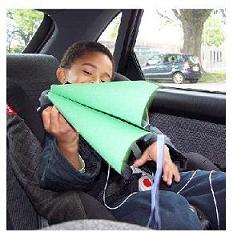
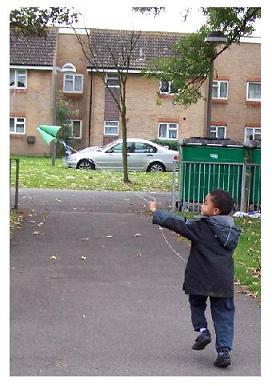
Does
this paper kite really fly? You bet! Just look at it in the picture
with its enthusiastic owner. I didn`t have to do much coaxing to get him
to run. I just got the camera ready and snapped. You probably notice
that the string is not very long. It doesn`t have to be! Only a few
yards is enough. When the string is short, you can play with your paper
kite in built up areas and small play grounds without them becoming
entangled in trees or getting in the way of traffic. |
 |
The crew had a grand day at the park, and at the day`s end, they wouldn`t let go of their kites. It just goes to show that a simple paper kite can give lots of fun. So what to do? Go fly a kite Kool Kids Crafts style!