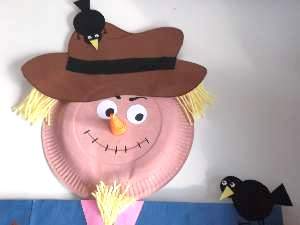
A Friendly Paper Plate Scarecrow
Do you have a friend to help you make this paper plate scarecrow? Old or young, it doesn`t really matter. Did you know? Adults amazingly transform into kids when asked to help in kid`s craft activities.
|
You will need: 1 white or colored, paper plate There is quite a lot to do on this kool kids crafts project. It way take more than one session if you are doing the full model alone, so if you want to see the end results today, team up! To begin, let`s make the head. |
 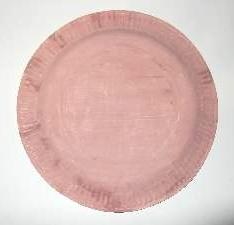 |
If you need to, paint your paper plate and leave to dry. It is best to paint it thin at first and then add a second coat.
While it is drying make the hat.
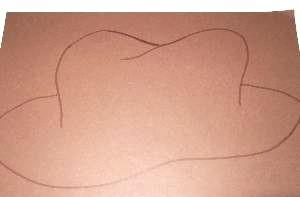 |
To make the hat look floppy, draw a peanut shape and then make a hump shape coming from the middle. This makes it look old and out of shape. Cut it out and either draw a black curvy band or cut one from black paper like I did. |
|
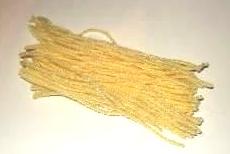
Here is how to make the straw. Wrap the yellow wool around your hand, take it off, and cut the loops at both ends to make short strands. Now separate the bunch into 2 equal amounts. |
 |
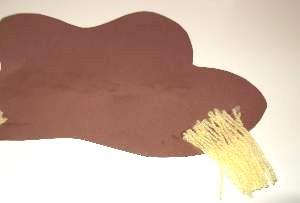 |
Don`t fiddle with it too long or the wool will start to stick to your fingers. If your making your straw from paper, just cut half of the yellow A5 into thin, short strips and stick them on. |
|
Ok! The paint should be dry so now you can complete the paper plate scarecrow. |
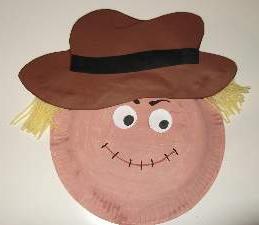 |
Draw the eyebrows
making them thin to thick on the inside and pointing a little downwards.
Not too much as our paper plate scarecrow is a friendly chap. The mouth
is a line curving upwards with stitches along it.
You can make up the nose at this stage but don`t attach it before the hat. (see below)
Apply paste to where the forehead will be and stick the hat on making sure that it`s facing the correct way.
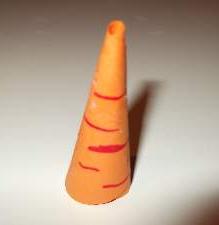 |
How to Make the Nose |
|
The paper plate scarecrow head is finished. If you would like a bird on the hat, or would like to make the full version, download the instructions. They can be accessed by signing up to CraftsWork Newsletter and printable crafts. Are you crazy about paper plate crafts??? Then here are some more to keep you happy! |
