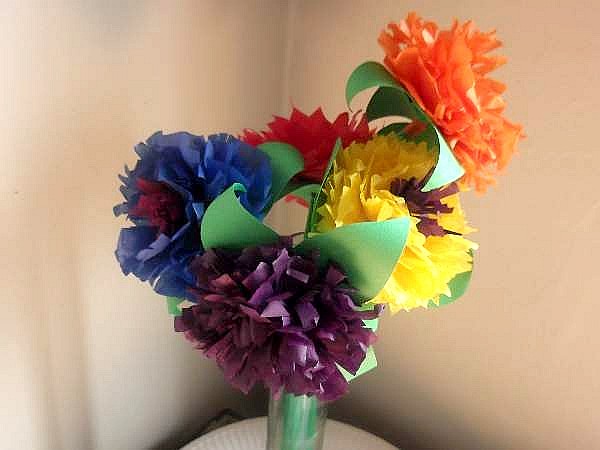
Make Tissue Paper Flowers For Mum
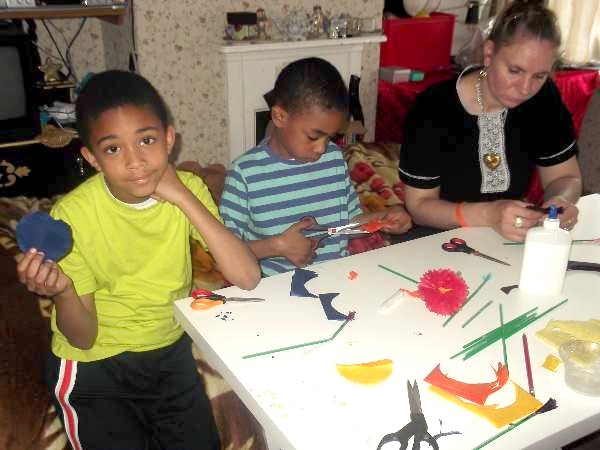
Spring is a colorful time of year and so inspiring that we just had to make tissue paper flowers of all the colors of the rainbow. These Spring crafts for kids are quite easy to make and of course they are done KKC style by our crew.
 |
 |
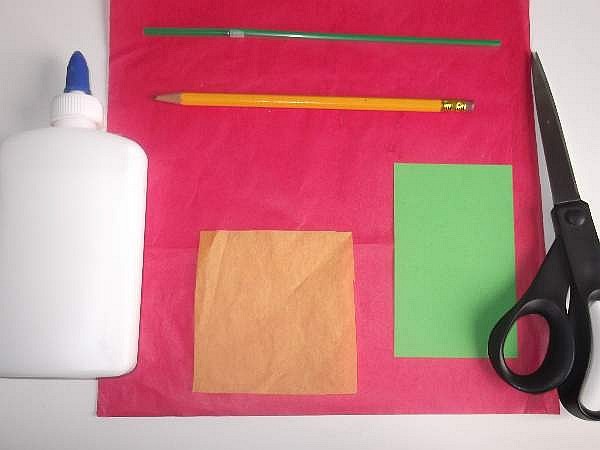
To make each flower of this lovely bouquet you will need the following materials:
|
2 squares 10" x 10" tissue paper (25cm x 25cm) |
 |
Step by Step Instructions
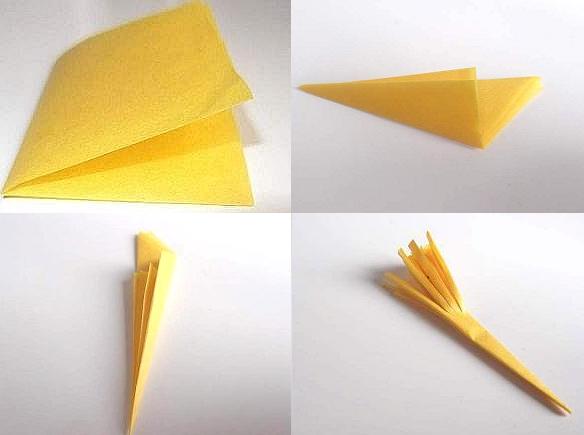
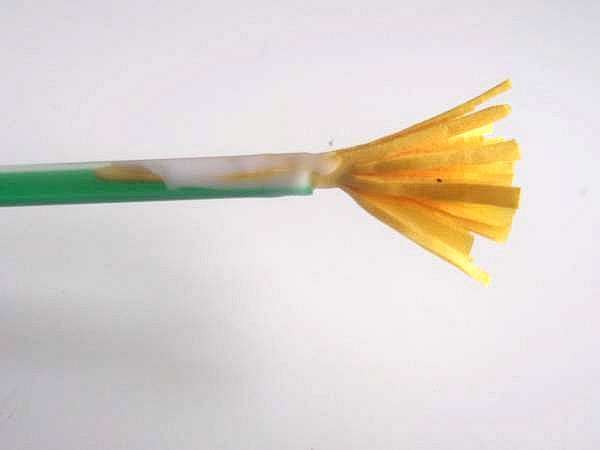
To begin, take the smallest square of tissue paper and fold it twice, then fold it twice diagonally, and if you can manage another fold do one more. Cut off the raw end and then shred half way along the length towards the peak. This is how you make the flower`s stamen.
Apply some glue along the shaft but not on the shredded part, then push it into the straw near the bendy end. You can place it on a radiator or somewhere warm to dry while you make up the petals.
How to Make Tissue Paper Flowers With Frilled Petals
Now to cut out 8 petals. Take the 2 large red squares and together fold them twice. Use something to draw a perfect circle and cut it out. if you want your flower to look frilly, cut zigzags all around the circumference.
But each petal needs a hole, so fold it twice and cut off the center. Make the cut very small or the hole will be too l
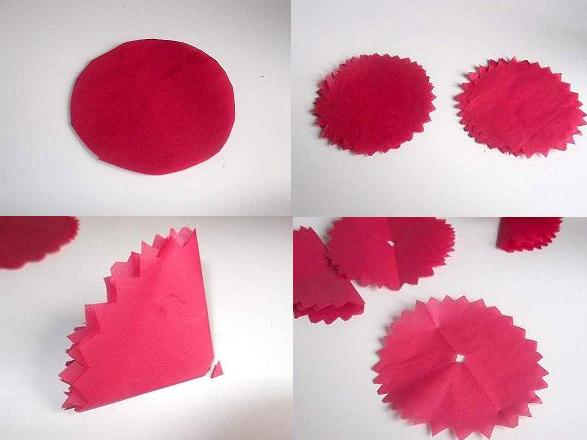
To make the petals crumpled, fold them in half and then fold into an accordion, squeeze it and then open it up. Do this to all 8 petals.
You are now ready to stick them onto the straw. Place a little glue, not too much, onto the end of the straw and not the stamen. Push 1 petal onto the straw from the other end and stick it just beneath the stamen.
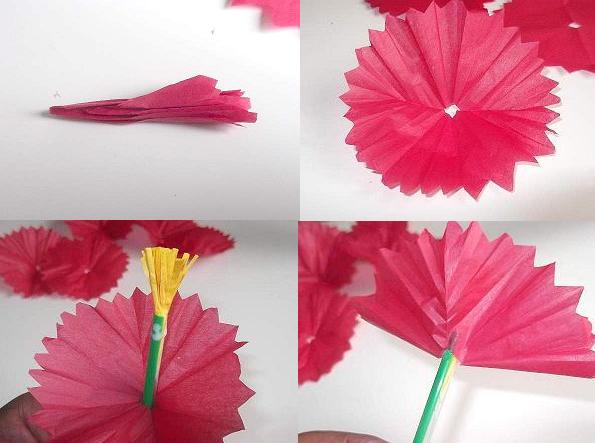
See the illustration to get it right. Stick each petal just below the previous one with a touch of glue for all 8. If you happen to put too much glue on any then just stick on the next without glue which will soak up any excess.
If you hold the petals in your other hand it will keep them in place and out out the way while you stick the middles to the straw. Now leave the flower to dry as you prepare and cut out the leaves.
Fold the green paper twice and draw a leaf shape like the illustration.
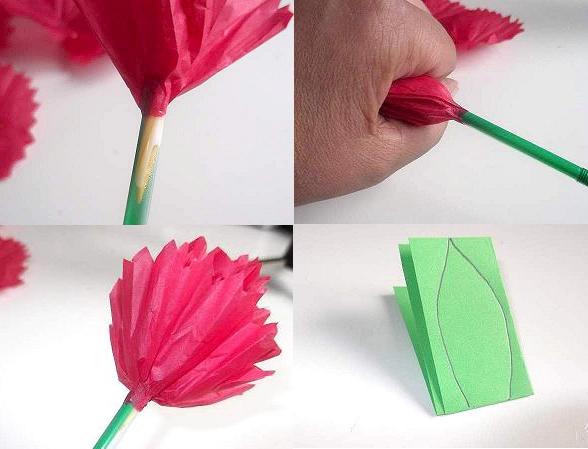
Cut out the shape so you have two double leaves, and make a notch in the center of the fold for the holes.
Glue those together and let it dry. Once dry you can curl the leaves. To do this, hold the leaf between your finger and the edge of the table and pull it through gently. The leaf will curl up.
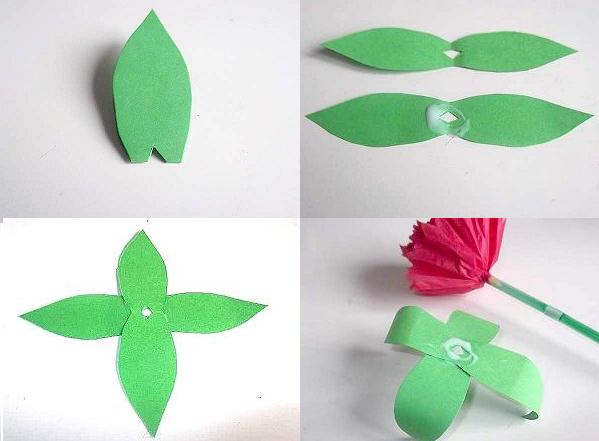
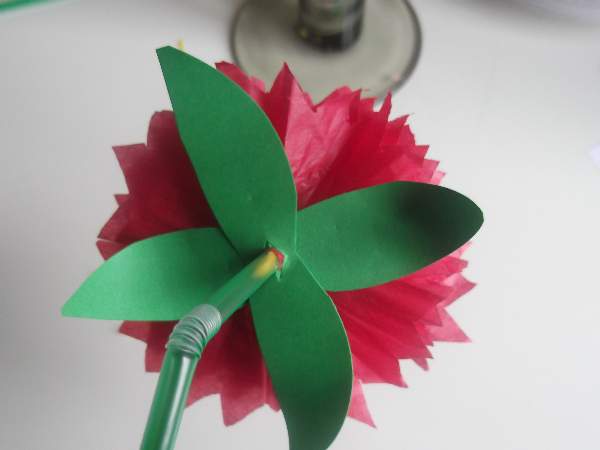
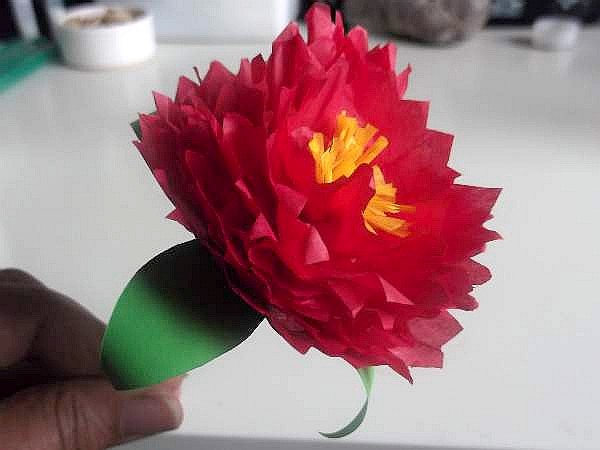
Now apply some glue and insert the straw into the hole and push all the way up to the flower and stick in place. Your flower needs to dry now before you open up the petals and stamen.
When you have made a bouquet you can bend some of the flowers and keep some straight.
Step into April and May with preschool Spring Crafts
 |
 |