A Sled Kite You Can Make Yourself!
Some kids have never heard of a sled kite before. If that`s you, you don`t know what you`ve been missing! They are one of the best wind toys you can make and get so much fun out of.
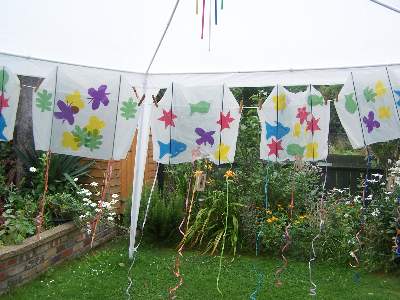
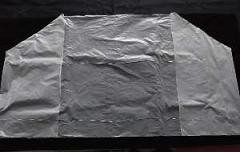
It didn`t take much for the kids at the Kool Kids Crafts Summer Workshop to make these pretty ones. Here is a list of materials for the job.
|
1 medium white bin liner2 green garden sticks |
felt tip pens (optional) |
|
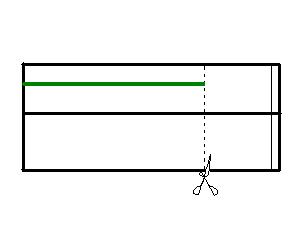
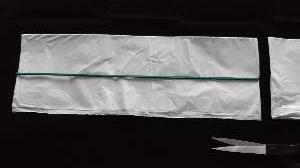
Do not open the bin liner yet but lay it flat. Most bin liners have 8 creases, 2 of them run down the center. You can open it once it`s cut. Mark it at the spot where the stick ends and cut off the excess. |
  |
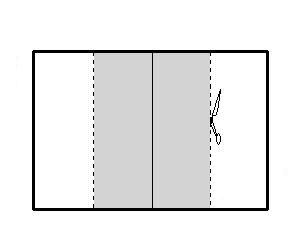 |
Open the bin liner very carefully. It is still a tube with no seams but with 8 crease lines. Lay it flat again on the creases at both sides. There should be 3 other creases showing on top. Pick up the top layer of your tube and cut out the 2 middle shaded areas using the crease lines as guides. (See Picture left.) |
If your bin liner does not have this many folds, don`t worry! Open it up and flatten it regardless and measure and mark 1/4 of the width along the top and bottom from both sides. Draw lines from the top marks to the bottom marks and cut. Make sure you are not cutting the layer underneath. Leave in that position.
 Measure 1/3 along from (B) to (B1) at the bottom corners and fold inwards along point (A) to point (B1) and tape the entire length of the fold in place. |
Measure 1/3rd way down both sides from the top of the liner and mark. Cut from these points (A) diagonally to the top points (A1). (See illust.) 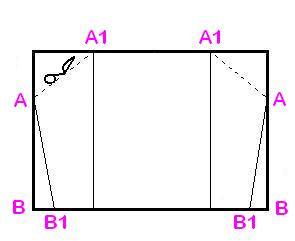 |
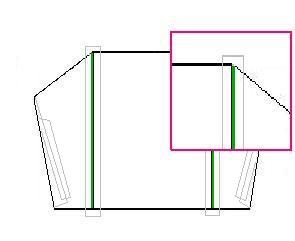 |
If you have managed to get this far, well done! Your bin liner is beginning to take shape and look like a sled kite. The next step is to fix the spars into place. The green garden sticks are what you need for this. They form a sail structure to the kite. |
Place them just before the edges, from (A1) to (B1) on the right and left sides. Try and make both sides identical so that your sled kite will fly.
Now use the wide tape with enough to overlap at top and bottom, and stick down both spars, catching in the raw edges with them. Fold the overlap tape to the other side of the kite. You have now created wind funnels at both sides that help the kite to soar.
|
Ok! Almost there! At both (A) points, double stick some tape on the back and front of these corners. This is to re-enforce these points where the bridle string attaches to the sled kite. |
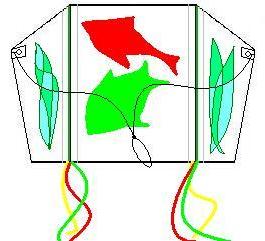 |
Now decorate your kite with some shapes. Don`t use glue but use small pieces of sticky tape to attach them and the streamers to points (B1).
The bridle string should be about double the length from point (A) to point (A). Once you attach it, find the center and tie a loop.
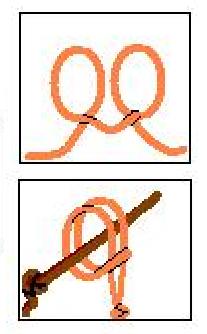 |
Attach the bridle to the kite line by first making a double knot at the end of your flying line. Form a double loop with the loop you made in the bridle, and fold them together. Slip the knot of the flying line through these 2 loops and pull them tight to catch the knot. (See the illustration left.) Brilliant! Your sled kite is finished and ready to fly. See how to make more easy kites here... |