Make Your Own Calendar
Ready for the New Year
|
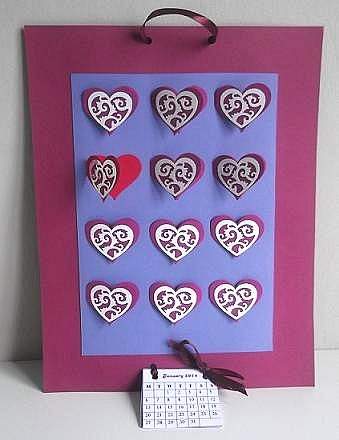
We have some nice ideas for you to make your own calendar. Start now ready for the new year. This pretty heart design will bring a smile to any girls face. Be it your mum, sister, friend, or your sweetheart. For boys just swap the mini heart cards for something masculine like car shaped ones. Each heart mini card represents a month. The red heart is for a special date. Now what you wish to put in them is up to you. We thought of using them to set a goal for every month but you may wish to put in photos of friends or flowers. For the boys, how about writing a joke for each month or a funny verse? Plan who the calendar is for and which date is special to them. Follow the tutorial on how to make it. |
Materials You Will Need to Make Your Own Calendar
|
|
|
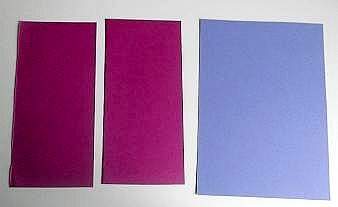
Because KoolKidsCrafts is an international website, I have not stated the weight of the card you will need. This is not hard to work out though. Just choose a thin card so that you can punch out your shapes even when the card is doubled, and a thicker sturdier card for the backing. |
To make the little heart cards, half the A4 sheet in the primary colour and then fold both halves. Insert it into the punch but leave a very narrow gap at the side. (See the picture.) This will make a folded mini card.
|
If you don`t have a heart punch, use or make a stencil. To make one, fold a piece of thick card and draw a half heart shape. Cut it out and open it up. When you make it this way your heart will have identical sides. If you want to make an odd shaped heart do not fold the card and draw the whole shape. Use the stencil in the same way. Place it just a little over the edge of the folded card, draw an outline and cut it out. |
|
Cut 7cm off one side and 11cm off the top. Now paste the reverse side of the card with the hearts attached to it and stick it onto the background card, making sure you center position it. |
Cut out 12 of these hearts, but before sticking them onto the A4 card, you need to alter its size. Cut 4cm off one side and 6cm off the top then paste the hearts onto it 4 rows of 3. (See the picture.) Let it dry while you prepare the background A3 card. This needs cutting down to a smaller size also. |
Rather than hunting around that takes up time, make your own calendar date book. Using a word processor, select the table format tool to make a table and then format your own style with the dates. To know which days fall on each number of the month, either check a current diary which usually contains the calender for the following year or search online.
Follow the next 2 lists of instructions step by step to make your own calendar look professional.
|
Punching the Holes
|
Attaching the Tabs and the Hanging Loop
|
Other ideas to make your own calendar...
Click to see a variety of paper crafts here..


